1 安装NexT v8.0
打开命令行,进入博客根目录,使用git下载NexT主题
1# 下载NexT主题
2git clone https://github.com/next-theme/hexo-theme-next themes/next
然后修改博客根目录下的_config.yml配置文件,将主题设置为NexT
1theme: next
然后重新生成一下博客,打开本地服务
1# 清除缓存
2hexo clean
3# 生成静态文件
4hexo generate
5# 启动服务(开启调试)
6hexo server --debug
访问http://localhost:4000/,查看效果
2 配置修改
2.1 博客配置
以下配置,需添加至博客根目录下_config.yml中
博客信息
1title: 标题
2subtitle: '子标题'
3description: '描述'
4keywords: 关键词
5author: 作者
开启中文
1language: zh-CN
修改文章永久链接
文章标题大多使用中文,但是URL并不推荐包含中文,也不利于SEO
1url: https://gh1656409967.github.io/
2permalink: posts/:hash/
自动检测高亮
1highlight:
2  auto_detect: true
3  tab_replace: '    '
显示文章数
1index_generator:
2  per_page: 30
每页页码
1per_page: 30
默认分类
1default_category: 测试
2.2 主题配置
以下配置,需添加至博客根目录下_config.next.yml中
切换布局方案
NexT提供Muse、Mist、Pisces和Gemini四种布局方案。
1scheme: Pisces
添加子标题
1index_with_subtitle: true
关闭页面底部博客信息
1footer:
2  powered: false
添加自定义menu菜单
- 格式为
Key: /link || icon,icon即为Font Awesome提供的图标。 - 修改主题目录下
languages/zh-CN.yml,在menu下添加对应菜单的中文,例如gallery: 相册,注意统一缩进。 - 在博客根目录,运行
hexo new page "菜单",编辑新建的source/菜单/index.md即可。
1menu:
2  about: /about/ || fa fa-user
3  gallery: /gallery/ || fa fa-camera
添加社交链接
1social:
2  GitHub: https://github.com/GH1656409967 || fa-brands fa-github
3  QQ: http://wpa.qq.com/msgrd?v=3&uin=1656409967&site=qq&menu=yes || fa-brands fa-qq
4  网易云: https://music.163.com/#/user/home?id=270121274 || fa fa-music
5  豆瓣: https://www.douban.com/people/215985894/ || fa fa-video-camera
添加友链
 1links_settings:
 2  icon: fa fa-link
 3  title: 友情链接
 4  layout: inline
 5
 6links:
 7  【jaihk662】: https://blog.csdn.net/jaihk662
 8  【信仰.】: https://blog.csdn.net/haut_ykc
 9  【SSimpLe_Y】: https://blog.csdn.net/ssimple_y
10  【柳婼のblog】: https://www.liuchuo.net/
11  【liweihang】: https://www.cnblogs.com/liweihang/
12  【ironz】: https://ironz.cn/
13  【Sysipus】: https://runzhaochen.github.io/
14  【Long_hen】: https://blog.csdn.net/Long_hen
15  【haut_bao】: https://blog.csdn.net/qq_41856950
16  【阿清そ 】: https://aqingya.cn/
目录设置
开启目录,关闭目录自动编号,开启目录自动换行,开启全部展开
1toc:
2  enable: true
3  number: false
4  wrap: true
5  expand_all: true
开启文章结尾版权声明
1creative_commons:
2  post: true
文章结尾打赏
添加文章结尾打赏图片,图片放至主题目录的source/images/下
1reward_settings:
2  enable: true
3  animation: false
4
5reward:
6  wechatpay: /images/wechatpay.png
7  alipay: /images/thanks.png
8  bitcoin: /images/alipay.png
修改themes/next/languages/zh-CN.yml,文字与图片对应
1reward:
2  wechatpay: 微信
3  alipay: 感谢
4  bitcoin: 支付宝
网站头像
图片放至主题目录的source/images/下
1avatar:
2  url: /images/avatar.png
网站图标
图片放至主题目录的source/images/下
1favicon:
2  small: /images/favicon-16x16-.png
3  medium: /images/favicon-32x32-.png
设置字体
设置字体为Fira Code和思源黑体
 1font:
 2  enable: true
 3
 4  # Uri of fonts host, e.g. https://fonts.googleapis.com (Default).
 5  host:
 6
 7  # Font options:
 8  # `external: true` will load this font family from `host` above.
 9  # `family: Times New Roman`. Without any quotes.
10  # `size: x.x`. Use `em` as unit. Default: 1 (16px)
11
12  # Global font settings used for all elements inside <body>.
13  global:
14    external: true
15    family: 'Fira Code,Noto Sans SC'
16    size:
17
18  # Font settings for site title (.site-title).
19  title:
20    external: true
21    family: 'Fira Code,Noto Sans SC'
22    size:
23
24  # Font settings for headlines (<h1> to <h6>).
25  headings:
26    external: true
27    family: 'Fira Code,Noto Sans SC'
28    size:
29
30  # Font settings for posts (.post-body).
31  posts:
32    external: true
33    family: 'Fira Code,Noto Sans SC'
34
35  # Font settings for <code> and code blocks.
36  codes:
37    external: true
38    family: 'Fira Code,Noto Sans SC'
设置代码高亮
1codeblock:
2  theme:
3    light: atom-one-light
代码一键复制
1codeblock:
2  copy_button:
3    enable: true
4    show_result: true
切换CDN
jsdelivr容易寄,可以换cdnjs或者unpkg
1vendors:
2  plugins: unpkg
3 功能添加
3.1 图片不显示
此处仅处理本地图片引用,不考虑使用图床的情况
从之前生成的静态文件中,可以看到图片未上传至public目录,且图片路径是markdown源文件中的绝对路径,而不是相对路径。
首先修改博客根目录_config.yml配置文件,开启上传资源文件夹
1post_asset_folder: true
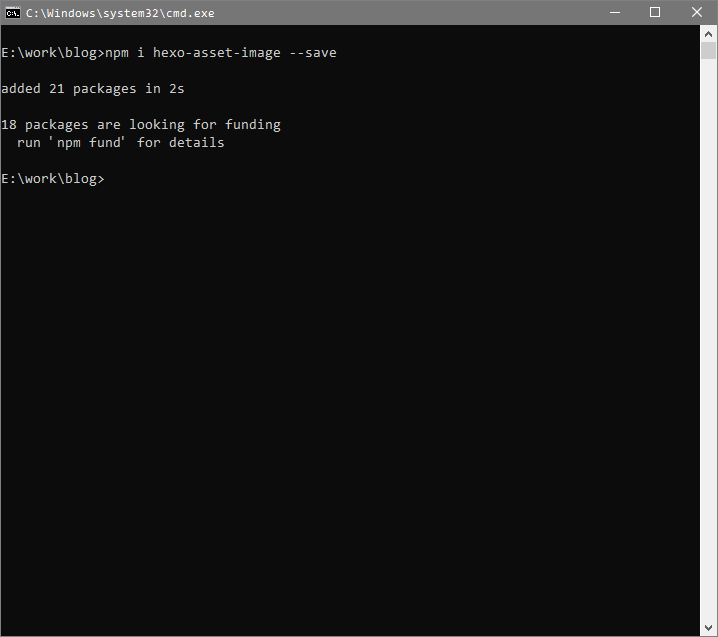
然后需要安装一个图片路径转换插件,打开命令行,进入博客根目录,执行以下命令
1npm i hexo-asset-image --save
修改此插件源码/node_modules/hexo-asset-image/index.js,修改内容参看注释
 1  ...
 2
 3  if(config.post_asset_folder){
 4    var link = data.permalink;
 5    var beginPos = getPosition(link, '/', 3) + 1;
 6    /* 注释以下内容
 7    var appendLink = '';
 8    // In hexo 3.1.1, the permalink of "about" page is like ".../about/index.html".
 9    // if not with index.html endpos = link.lastIndexOf('.') + 1 support hexo-abbrlink
10    if(/.*\/index\.html$/.test(link)) {
11      // when permalink is end with index.html, for example 2019/02/20/xxtitle/index.html
12      // image in xxtitle/ will go to xxtitle/index/
13      appendLink = 'index/';
14      var endPos = link.lastIndexOf('/');
15    }
16    else {
17      var endPos = link.lastIndexOf('.');
18    }
19    link = link.substring(beginPos, endPos) + '/' + appendLink;
20    */
21    /* 修改为下面两行 */
22    var endPos = link.lastIndexOf('/') + 1;
23    link = link.substring(beginPos, endPos);
24
25    var toprocess = ['excerpt', 'more', 'content'];
26
27    ...
28
29      // 将所有'src'替换为'data-src'
30      $('img').each(function(){
31        if ($(this).attr('data-src')){
32          // For windows style path, we replace '\' to '/'.
33          var src = $(this).attr('data-src').replace('\\', '/');
34          if(!(/http[s]*.*|\/\/.*/.test(src)
35            || /^\s+\//.test(src)
36            || /^\s*\/uploads|images\//.test(src))) {
37            ...
38
39            $(this).attr('data-src', config.root + link + src);
40            console.info&&console.info("update link as:-->"+config.root + link + src);
41          }
42    ...
清除缓存,重新生成博客,打开本地服务,查看效果
3.2 MathJax
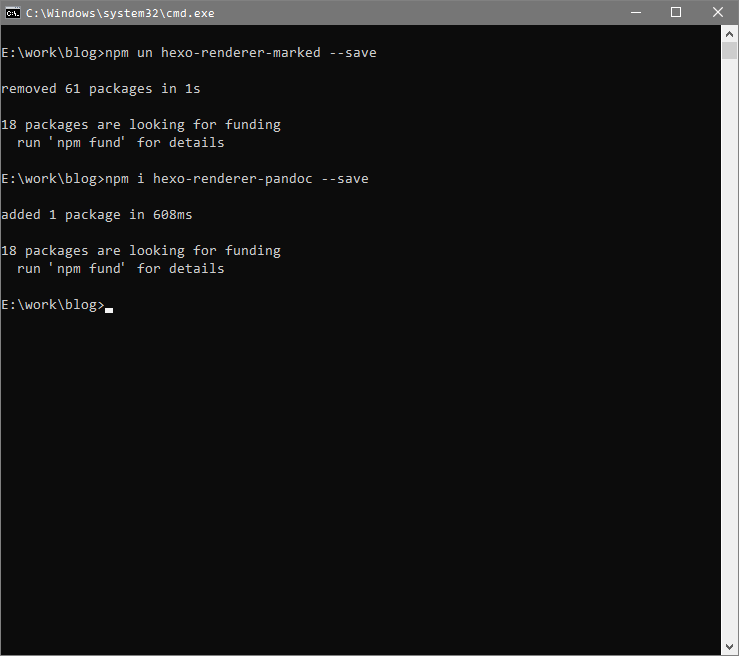
使用MathJax,开启LaTeX数学公式支持。首先更换解析器,打开命令行,进入博客根目录,执行以下命令
1# 卸载hexo-renderer-marked
2npm uninstall hexo-renderer-marked --save
3# 安装hexo-renderer-pandoc
4npm install hexo-renderer-pandoc --save
然后安装Pandoc,并且配置好环境变量。在博客根目录_config.next.yaml中添加
1math:
2  mathjax:
3    enable: true
使用时需要在文章的front-matter里打开mathjax: true,简单测试
1$$ x = {-b \pm \sqrt{b^2-4ac} \over 2a} $$
$$ x = {-b \pm \sqrt{b^2-4ac} \over 2a} $$
1$$ f(a) = \frac{1}{2\pi i} \oint\frac{f(z)}{z-a}dz $$
$$ f(a) = \frac{1}{2\pi i} \oint\frac{f(z)}{z-a}dz $$
1$$ \cos(\theta+\phi)=\cos(\theta)\cos(\phi)−\sin(\theta)\sin(\phi) $$
$$ \cos(\theta+\phi)=\cos(\theta)\cos(\phi)−\sin(\theta)\sin(\phi) $$
1$$ \int_D ({\nabla\cdot} F)dV=\int_{\partial D} F\cdot ndS $$
$$ \int_D ({\nabla\cdot} F)dV=\int_{\partial D} F\cdot ndS $$
1$$
2\vec{\nabla} \times \vec{F} =
3      \left( \frac{\partial F_z}{\partial y} - \frac{\partial F_y}{\partial z} \right) \mathbf{i}
4    + \left( \frac{\partial F_x}{\partial z} - \frac{\partial F_z}{\partial x} \right) \mathbf{j}
5    + \left( \frac{\partial F_y}{\partial x} - \frac{\partial F_x}{\partial y} \right) \mathbf{k}
6$$
$$ \vec{\nabla} \times \vec{F} = \left( \frac{\partial F_z}{\partial y} - \frac{\partial F_y}{\partial z} \right) \mathbf{i} + \left( \frac{\partial F_x}{\partial z} - \frac{\partial F_z}{\partial x} \right) \mathbf{j} + \left( \frac{\partial F_y}{\partial x} - \frac{\partial F_x}{\partial y} \right) \mathbf{k} $$
1$$ \sigma = \sqrt{ \frac{1}{N} \sum_{i=1}^N (x_i -\mu)^2} $$
$$ \sigma = \sqrt{ \frac{1}{N} \sum_{i=1}^N (x_i -\mu)^2} $$
1$$
2(\nabla_X Y)^k = X^i (\nabla_i Y)^k
3    = X^i \left( \frac{\partial Y^k}{\partial x^i} + \Gamma_{im}^k Y^m \right)
4$$
$$ (\nabla_X Y)^k = X^i (\nabla_i Y)^k = X^i \left( \frac{\partial Y^k}{\partial x^i} + \Gamma_{im}^k Y^m \right) $$
3.3 搜索功能
安装搜索插件
1npm i hexo-generator-searchdb --save
打开 _config.next.yml ,添加
1local_search:
2  enable: true
打开hexo的站点配置 _config.yml,添加
1search:
2  path: search.json
3  field: post
4  format: html
5  limit: 10000
3.4 统计功能
显示文章字数统计、阅读时长及总字数。首先安装插件
1npm i hexo-word-counter --save

修改博客根目录_config.yml配置
1symbols_count_time:
2  symbols: true
3  time: true
4  total_symbols: true
5  total_time: true
6  exclude_codeblock: true
7  awl: 2
8  wpm: 300
9  suffix: "分钟"
修改博客根目录_config.next.yml主题配置
1symbols_count_time:
2  separated_meta: false
3  item_text_total: true
3.5 简易相册
得益于Markdown和HTML混编可以被部分解析器解析的优势,可以使用HTML+CSS,添加一个简易相册。
注意:之前由于为了使用MathJax而更换解析器为Pandoc,对于需要解析raw-html的文章,所有标签前不应有空格,且块级标签前后需要留出空行
首先hexo n page gallery,创建图库。修改图库页面gallery/index.md,按照以下格式添加相册,相册封面图片放至gallery/index/目录下。
 1<div class="gallery-list">
 2<div class="gallery-item">
 3<a href="相册1/"><img data-src="gallery/index/相册1封面.jpg"></a>
 4<p>-相册1-</p>
 5</div>
 6
 7<div class="gallery-item">
 8<a href="相册2/"><img data-src="gallery/index/相册2封面.jpg"></a>
 9<p>-相册2-</p>
10</div>
11</div>
新建相册页面gallery/相册名/index.md,按照以下格式添加图片,图片放至gallery/相册名/index/目录下,其它相册同理。
1
2<div class="img-list">
3<div class="img-item"><img data-src="相册1/index/图片1.png" alt="图片1标题"></div>
4<div class="img-item"><img data-src="相册1/index/图片2.jpg" alt="图片2标题"></div>
5<div class="img-item"><img data-src="相册1/index/图片3.png" alt="图片3标题"></div>
6<div class="img-item"><img data-src="相册1/index/图片4.png" alt="图片4标题"></div>
7<div class="img-item"><img data-src="相册1/index/图片5.jpg" alt="图片5标题"></div>
8<div class="img-item"><img data-src="相册1/index/图片6.png" alt="图片6标题"></div>
9</div>
在博客根目录下 _config.next.yml 中添加
1menu:
2  gallery: /gallery/ || fa fa-camera
在主题目录下,修改国际化文件languages\zh-CN.yml,添加
1menu:
2  gallery: 相册
在博客根目录下,新建source/_data/styles.styl,添加自定义样式
 1// 自定义相册
 2.img-list, .gallery-list {
 3    gap: 1rem;
 4    grid-gap: 1rem;
 5    display: grid;
 6    grid-template-columns: repeat(auto-fit, minmax(250px, 1fr));
 7    padding: 1rem;
 8    align-items: center;
 9    align-content: center;
10    justify-items: center;
11    justify-content: center;
12}
13
14.img-item img, .gallery-item img {
15    width: 250px;
16    height: 200px;
17    object-fit: cover;
18    border: 1px solid rgba(221, 221, 221, 0.5);
19    border-radius: 7px;
20    margin-top: 10px;
21    margin-left: 5px;
22    margin-right: 5px;
23}
24
25.gallery-item p {
26    margin: 0 auto;
27    max-width: 50%;
28    border: 1px solid $black-deep;
29    border-radius: 7px;
30    background: rgba(255, 255, 255, 0.3);
31    box-shadow: 0 8px 20px -8px rgba(0, 0, 0, 0.3);
32    color: $black-deep;
33    text-align: center;
34    font-size: 15px;
35}
36
37@media (max-width: 767px) {
38    .gallery-item p {
39        min-width: 75px;
40        font-size: 13px;
41    }
42}
修改博客根目录下_config.next.yml,引用自定义样式
1custom_file_path:
2  style: source/_data/styles.styl
3.6 添加分类和标签
打开命令行,进入博客根目录,执行以下命令
1# 新建分类
2hexo n page categories
3# 新建标签
4hexo n page tags
修改source/categories/index.md,在front-matter中添加
1---
2title: 分类
3date: 2022-04-22 16:47:13
4type: "categories"
5---
修改source/tags/index.md,在front-matter中添加
1---
2title: 标签
3date: 2022-04-22 16:47:30
4type: "tags"
5---
3.7 代码折叠
在主题目录下,添加source/js/code-unfold.js,
 1var CODE_MAX_HEIGHT = 250;
 2var containers = [];
 3
 4// 展开
 5$('body').on('click', '.js_unfold_code_btn', function () {
 6    $(this).closest('.js_highlight_container').addClass('on');
 7});
 8// 收起
 9$('body').on('click', '.js_retract_code_btn', function () {
10    var $container = $(this).closest('.js_highlight_container').removeClass('on');
11    var winTop = $(window).scrollTop();
12    var offsetTop = $container.offset().top;
13    $(this).css('top', 0);
14    if (winTop > offsetTop) {
15        // 设置滚动条位置
16        $('body, html').animate({
17            scrollTop: $container.offset().top - CODE_MAX_HEIGHT
18        }, 600);
19    }
20});
21// 滚动事件,触发动画效果
22$(window).on('scroll', function () {
23    var scrollTop = $(window).scrollTop();
24    var temp = [];
25    for (let i = 0; i < containers.length; i++) {
26        var item = containers[i];
27        var {
28            $container,
29            height,
30            $hide,
31            hasHorizontalScrollbar
32        } = item;
33        if ($container.closest('body').length === 0) {
34            // 如果 $container 元素已经不在页面上, 则删除该元素
35            // 防止pjax页面跳转之后,元素未删除
36            continue;
37        }
38        temp.push(item);
39        if (!$container.hasClass('on')) {
40            continue;
41        }
42        var offsetTop = $container.offset().top;
43        var hideBtnHeight = $hide.outerHeight();
44        // 减去按钮高度,减去底部滚动条高度
45        var maxTop = parseInt(height - (hasHorizontalScrollbar ? 17 : 0) - hideBtnHeight);
46        let top = parseInt(
47            Math.min(
48                Math.max(scrollTop - offsetTop, 0), // 如果小于 0 ,则取 0
49                maxTop, // 如果大于 height ,则取 height
50            )
51        );
52        // 根据 sin 曲线设置"收起代码"位置
53        var halfHeight = parseInt($(window).height() / 2 * Math.sin((top / maxTop) * 90 * (2 * Math.PI / 360)));
54        $hide.css('top', Math.min(top + halfHeight, maxTop));
55    }
56    containers = temp;
57});
58
59// 添加隐藏容器
60function addCodeWrap($node) {
61    var $container = $node.wrap('<div class="js_highlight_container highlight-container"><div class="highlight-wrap"></div></div>').closest('.js_highlight_container');
62
63    // 底部 "展开代码" 与 侧边栏 "收起代码"
64    var $btn = $(`
65    <div class="highlight-footer">
66      <a class="js_unfold_code_btn show-btn" href="javascript:;">展开代码<i class="fa fa-angle-down" aria-hidden="true"></i></a>
67    </div>
68    <a class="js_retract_code_btn hide-btn" href="javascript:;"><i class="fa fa-angle-up" aria-hidden="true"></i>收起代码</a>
69  `);
70
71    $container.append($btn);
72    return $container;
73};
74
75function codeUnfold() {
76    $('.highlight').each(function () {
77        // 防止重复渲染
78        if (this.__render__ === true) {
79            return true;
80        }
81        this.__render__ = true;
82        var $this = $(this);
83        var height = $(this).outerHeight();
84        if (height > CODE_MAX_HEIGHT) {
85            // 添加展开&收起容器
86            var $container = addCodeWrap($this, height);
87            containers.push({
88                $container,
89                height,
90                $hide: $container.find('.js_retract_code_btn'),
91                hasHorizontalScrollbar: this.scrollWidth > this.offsetWidth,
92            });
93        }
94    });
95};
在NexT主题中全局引用jQuery,或者在_config.next.yml中开启Fancybox,Fancybox会依赖jQuery,
1fancybox: true
引用code-unfold.js,在主题目录下,layout/_scripts/index.njk的最后添加
1{{- next_js('code-unfold.js') }}
修改主题目录下source/js/next-boot.js
1NexT.boot.refresh = function() {
2  // 添加一行代码
3  codeUnfold();
4  // ...
打开之前创建的source/_data/styles.styl,添加
 1// 展开收起效果
 2.highlight-container {
 3    position: relative;
 4    background-color: highlight-background;
 5
 6    &.on {
 7        .highlight-footer {
 8            display: none;
 9        }
10
11        .hide-btn {
12            display: flex;
13        }
14
15        .highlight-wrap {
16            max-height: none;
17        }
18    }
19
20    .highlight-wrap {
21        overflow: hidden;
22        max-height: 200px;
23    }
24
25    .highlight-footer {
26        position: absolute;
27        bottom: 0;
28        left: 0;
29        width: 100%;
30        height: 60px;
31        background-image: 'linear-gradient(-180deg, rgba(255,255,255,0) 0%, %s 65%)' % highlight-background;
32        text-align: center;
33    }
34
35    .show-btn {
36        position: absolute;
37        bottom: 0;
38        left: 50%;
39        padding: 0 0.8em;
40        border-radius: 4px 4px 0;
41        color: #fff;
42        text-align: center;
43        text-decoration: none;
44        font-size: 12px;
45        line-height: 2em;
46        transform: translateX(-50%);
47
48        &:hover {
49            text-decoration: none;
50        }
51    }
52
53    .hide-btn {
54        position: absolute;
55        top: 0;
56        left: -21px;
57        display: none;
58        flex-direction: column;
59        padding: 0.1em 0 0.6em;
60        width: 22px;
61        border-radius: 4px 0 0 4px;
62        background-color: highlight-background;
63        color: #fff;
64        text-align: center;
65        text-decoration: none;
66        font-size: 12px;
67        line-height: 1em;
68        transition: top ease 0.35s;
69    }
70
71    .fa-angle-up, .fa-angle-down {
72        color: #fff;
73        font-style: normal;
74    }
75
76    .fa-angle-up:before {
77        content: '\f106';
78    }
79
80    .fa-angle-down:before {
81        margin-left: 0.5em;
82        content: '\f107';
83    }
84
85    .js_unfold_code_btn, .js_retract_code_btn {
86        border-bottom: none !important;
87        background: rgba(0, 0, 0, 0.5);
88
89        &:hover {
90            border-bottom-color: none !important;
91        }
92    }
93}
3.8 折叠内容
在主题目录下创建scripts/tags/fold_tag.js
 1/* global hexo */
 2// Usage: {% fold Title %} Something {% endfold %}
 3function fold(args, content) {
 4    var text = args[0];
 5    if (!text) text = "点击显示/隐藏";
 6    return '<div><div class="fold_hider"><div class="close hider_title">' +
 7        hexo.render.renderSync({
 8            text: text,
 9            engine: 'markdown'
10        }).replace(/^<p>/, '').replace(/<\/p>$/, '') +
11        '</div></div><div class="fold">\n' +
12        hexo.render.renderSync({
13            text: content,
14            engine: 'markdown'
15        }) +
16        '\n</div></div>';
17}
18hexo.extend.tag.register('fold', fold, {
19    ends: true
20});
在主题目录下创建source/js/fold_action.js
1$(document).ready(function () {
2    $(document).on('click', '.fold_hider', function () {
3        $('>.fold', this.parentNode).slideToggle();
4        $('>:first', this).toggleClass('open');
5    });
6    //默认情况下折叠
7    $("div.fold").css("display", "none");
8});
打开之前创建的source/_data/styles.styl,添加
 1// toggle hider title
 2.hider_title {
 3    cursor: pointer;
 4    background: #eeeeee;
 5}
 6
 7// toggle indicators
 8.close:before {
 9    padding-left: 0.5em;
10    padding-right: 0.5em;
11    content: '▼';
12}
13
14.open:before {
15    padding-left: 0.5em;
16    padding-right: 0.5em;
17    content: '▲';
18}
19
20// inline code
21p code, .hider_title code {
22    color: #c71585;
23    background: #fffafa;
24    margin: 2px;
25}
在博客根目录_config.next.yml中添加
1custom_file_path:
2  bodyEnd: source/_data/body-end.njk
在博客根目录下创建source/_data/body-end.njk
1{# 代码折叠 #}
2<script type="text/javascript" src="/js/fold_action.js"></script>
使用fold标签,可以折叠内容
1{% fold 折叠内容 %}
2    Hello World
3{% endfold %}
{% fold 折叠内容 %} Hello World {% endfold %}
注意:如果开启了
pjax,则需要修改主题目录下source/js/next-boot.js
1NexT.boot.refresh = function() {
2  // 添加一行代码
3  $("div.fold").css("display", "none");
4  // ...
3.9 压缩
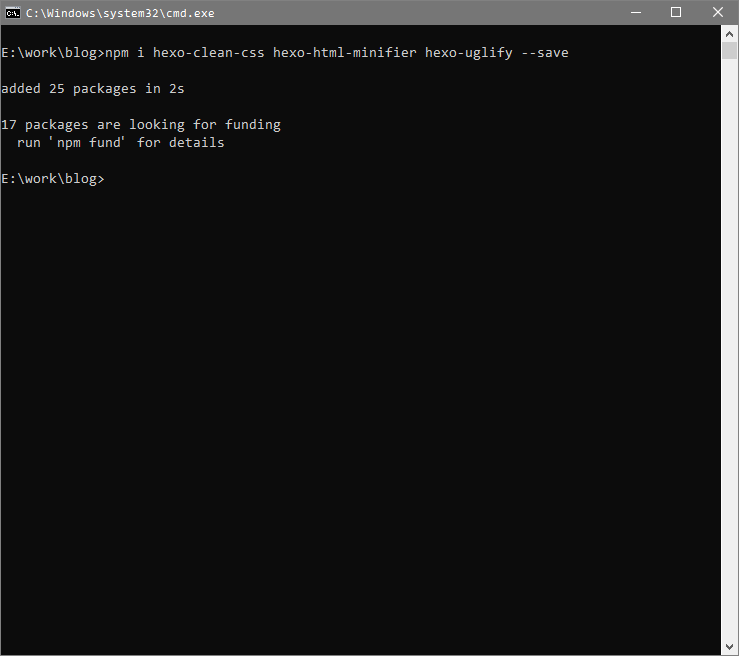
添加官方插件hexo-clean-css、hexo-html-minifier和hexo-uglify
1npm i hexo-clean-css hexo-html-minifier hexo-uglify --save
在博客根目录_config.yml中添加
 1uglify:
 2  mangle: true
 3  # 这儿不能为空,为空会导致 js 文件压缩
 4  # output:
 5  # compress:
 6  exclude:
 7    - '*.min.js'
 8  es6: false
 9
10clean_css:
11  exclude:
12    - '*.min.css'
13
14html_minifier:
15  collapseBooleanAttributes: true
16  collapseWhitespace: true
17  # Ignore '<!-- more -->' https://hexo.io/docs/tag-plugins#Post-Excerpt
18  ignoreCustomComments: [ !!js/regexp /^\s*more/]
19  removeComments: true
20  removeEmptyAttributes: true
21  removeScriptTypeAttributes: true
22  removeStyleLinkTypeAttributes: true
23  minifyJS: true
24  minifyCSS: true
3.10 评论系统
Gitalk是一个基于GitHub Issue和Preact开发的评论插件。
首先需要去GitHub新建一个仓库,点击New创建

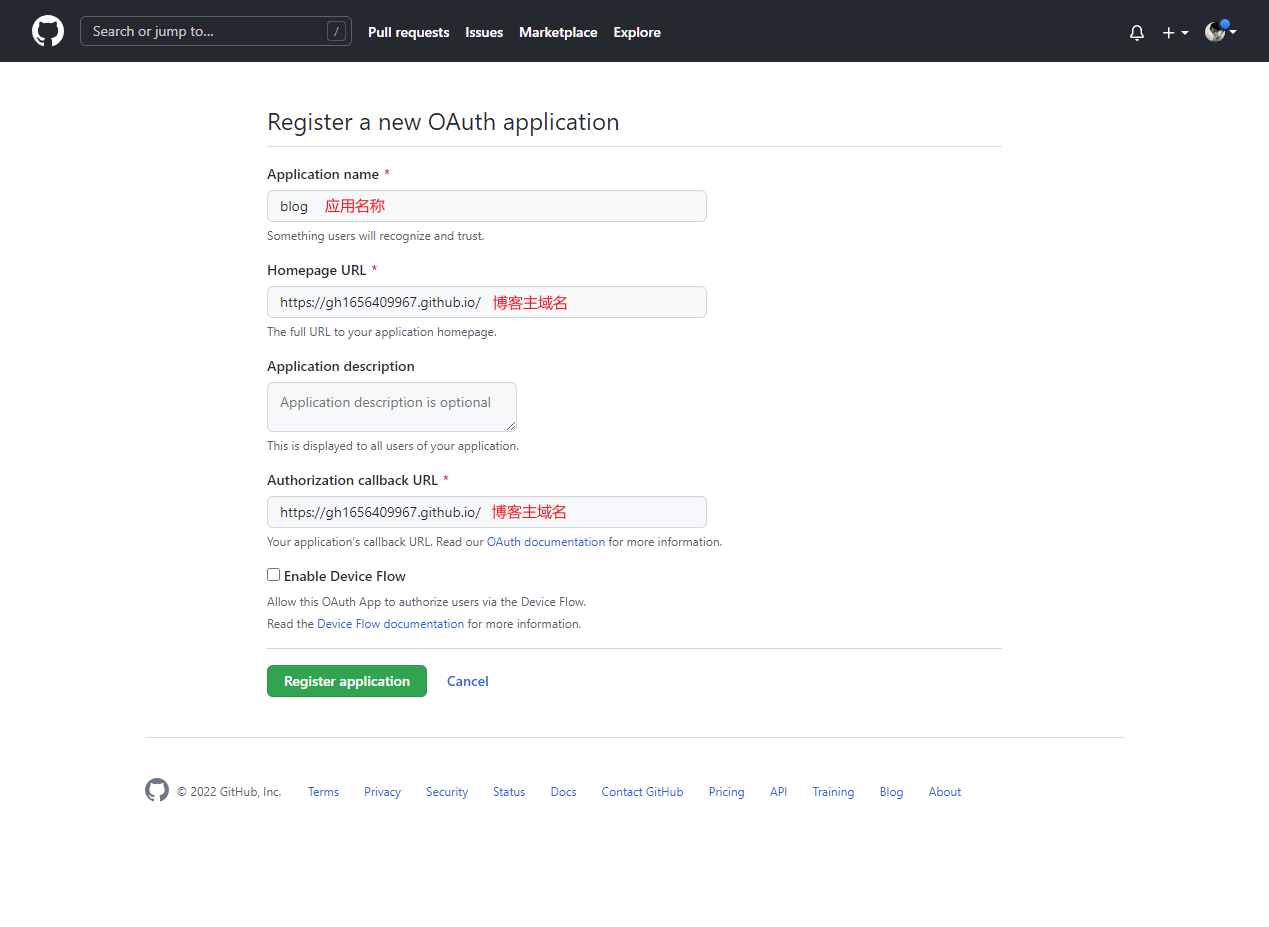
然后点击Generate a new client secret,验证GitHub密码后,保存好Client ID和Client secrets

在博客根目录下_config.next.yml中添加
 1comments:
 2  style: buttons
 3  active: gitalk
 4  storage: true
 5  lazyload: true
 6  nav:
 7    gitalk:
 8     order: -2
 9
10gitalk:
11  enable: true
12  github_id: gh1656409967
13  repo: Gitalk
14  client_id: adfg89av4s9bf4s89nsn
15  client_secret: 1561aefeaegadadag5e1a68bbfsnyfsrg4587sr7
16  admin_user: gh1656409967
17  distraction_free_mode: true
18  proxy: https://cors-anywhere.azm.workers.dev/https://github.com/login/oauth/access_token
19  language: zh-CN
然后每次新生成文章/页面后,都需要去文章页初始化Issues
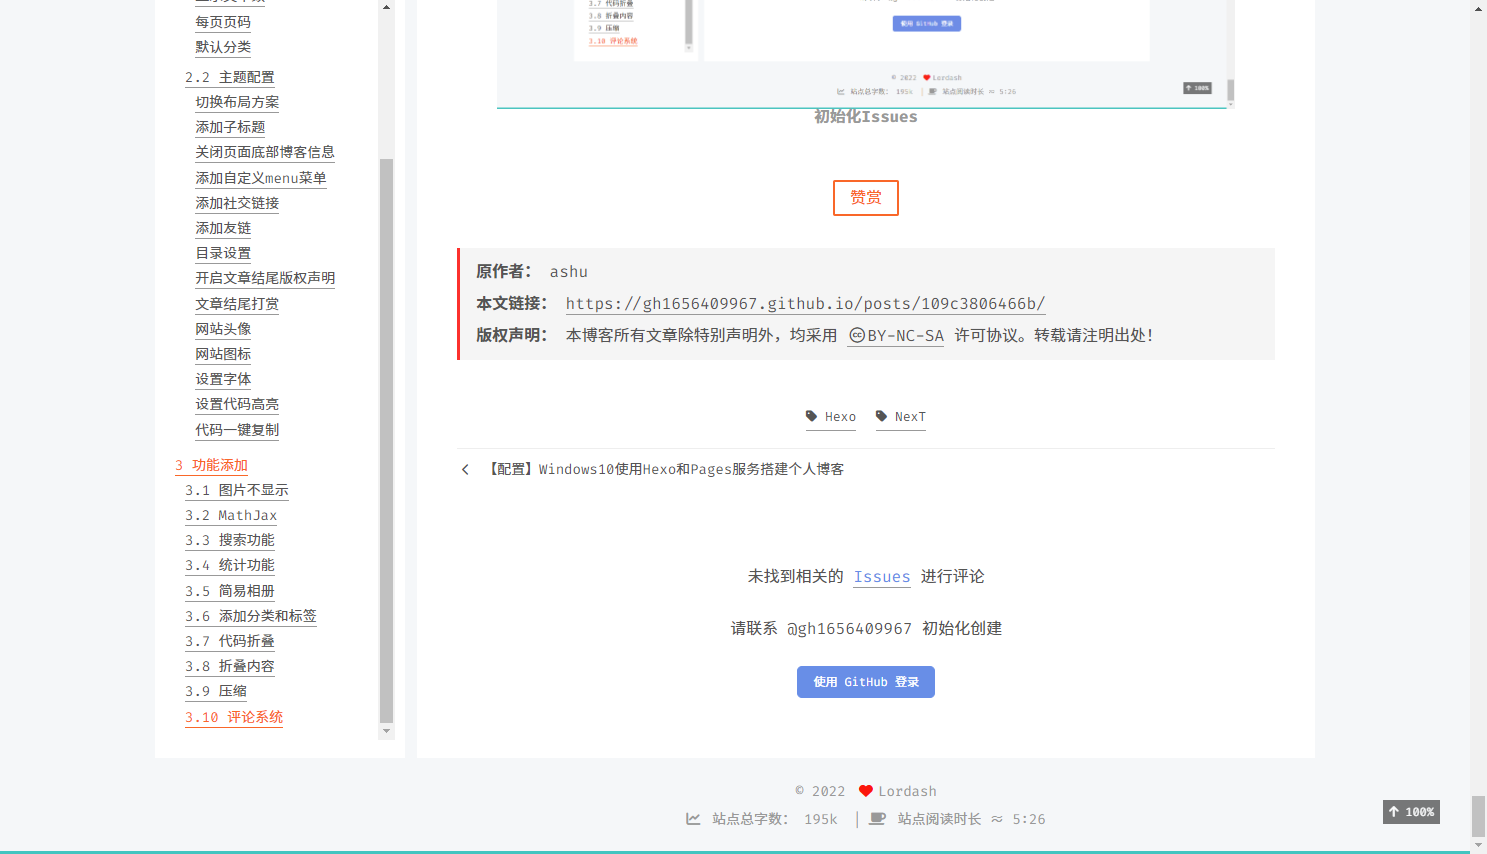
点击使用GitHub登录后,再点击Authorize username

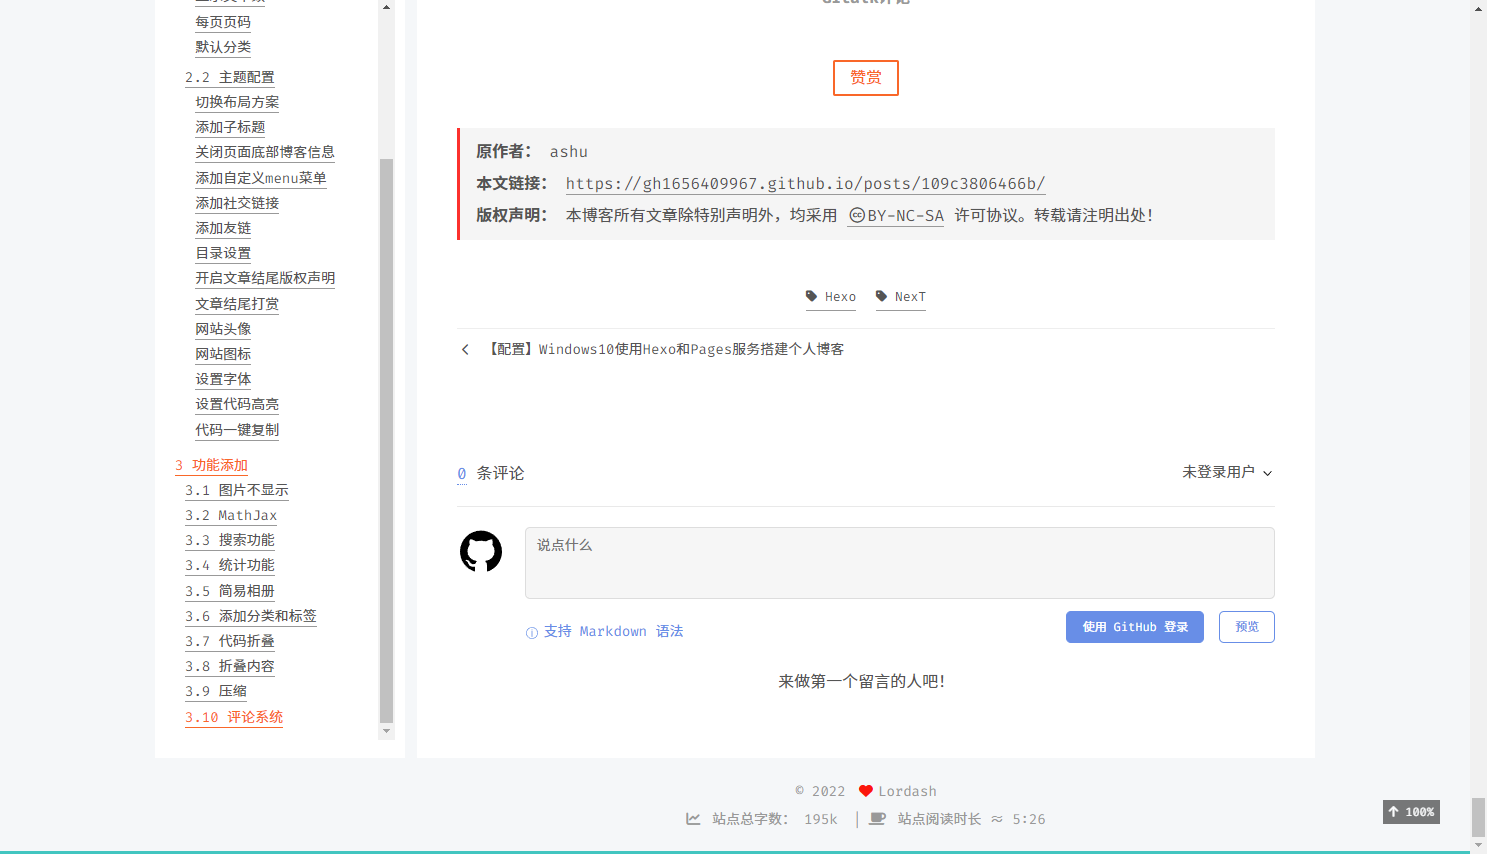
刷新后即可开启评论
3.11 博文加密
首先打开命令行,进入博客根目录,执行以下命令,安装hexo-blog-encrypt插件
1npm install hexo-blog-encrypt --save
在需要加密的文章开头front-matter中添加
1password: 123456
2abstract: 博文被加密了, 请输入密码查看。
3message: 您好, 这里需要密码。
4wrong_pass_message: 抱歉, 这个密码看着不太对, 请再试试。
注意,Fancybox可能会不加载,复制
themes\next\source\js\third-party\fancybox.js的内容,添加到node_modules\hexo-blog-encrypt\lib\hbe.js中
 1  ...
 2
 3  // 添加内容
 4  function refreshfancybox() {
 5    document.querySelectorAll('.post-body :not(a) > img, .post-body > img').forEach(element => {
 6      const $image = $(element);
 7      const imageLink = $image.attr('data-src') || $image.attr('src');
 8      const $imageWrapLink = $image.wrap(`<a class="fancybox fancybox.image" href="${imageLink}" itemscope itemtype="http://schema.org/ImageObject" itemprop="url"></a>`).parent('a');
 9      if ($image.is('.post-gallery img')) {
10        $imageWrapLink.attr('data-fancybox', 'gallery').attr('rel', 'gallery');
11      } else if ($image.is('.group-picture img')) {
12        $imageWrapLink.attr('data-fancybox', 'group').attr('rel', 'group');
13      } else {
14        $imageWrapLink.attr('data-fancybox', 'default').attr('rel', 'default');
15      }
16
17      const imageTitle = $image.attr('title') || $image.attr('alt');
18      if (imageTitle) {
19        // Do not append image-caption if pandoc has already created a figcaption
20        if (!$imageWrapLink.next('figcaption').length) {
21          $imageWrapLink.append(`<p class="image-caption">${imageTitle}</p>`);
22        }
23        // Make sure img title tag will show correctly in fancybox
24        $imageWrapLink.attr('title', imageTitle).attr('data-caption', imageTitle);
25      }
26    });
27
28    $.fancybox.defaults.hash = false;
29    $('.fancybox').fancybox({
30      loop: true,
31      helpers: {
32        overlay: {
33          locked: false
34        }
35      }
36    });
37  }
38
39  async function decrypt(decryptKey, iv, hmacKey) {
40    let typedArray = hexToArray(encryptedData);
41
42    const result = await cryptoObj.subtle.decrypt({
43      'name': 'AES-CBC',
44      'iv': iv,
45    }, decryptKey, typedArray.buffer).then(async (result) => {
46
47      ...
48
49      // 添加内容
50      refreshfancybox();
51
52      return await verifyContent(hmacKey, decoded);
53    }).catch((e) => {
54      alert(wrongPassMessage);
55      console.log(e);
56      return false;
57    });
58
59    ...
3.11 aplayer音乐播放器
首先打开命令行,进入博客根目录,执行以下命令,安装aplayer插件
1npm install aplayer --save
在source/_data/body-end.njk添加以下内容
 1<link rel="stylesheet" href="https://cdnjs.cloudflare.com/ajax/libs/aplayer/1.10.1/APlayer.min.css" integrity="sha512-CIYsJUa3pr1eoXlZFroEI0mq0UIMUqNouNinjpCkSWo3Bx5NRlQ0OuC6DtEB/bDqUWnzXc1gs2X/g52l36N5iw==" crossorigin="anonymous" referrerpolicy="no-referrer" />
 2<script src="https://cdnjs.cloudflare.com/ajax/libs/aplayer/1.10.1/APlayer.min.js" integrity="sha512-RWosNnDNw8FxHibJqdFRySIswOUgYhFxnmYO3fp+BgCU7gfo4z0oS7mYFBvaa8qu+axY39BmQOrhW3Tp70XbaQ==" crossorigin="anonymous" referrerpolicy="no-referrer"></script>
 3<div id="aplayer"></div>
 4
 5<script>
 6    const ap = new APlayer({
 7        container: document.getElementById('aplayer'),
 8        fixed: true,
 9        listFolded: true,
10        lrcType: 3,
11        audio: [
12        {
13            name: 'AVICII UMF2016 Live',
14            artist: 'Avicii',
15            url: 'https://music.163.com/song/media/outer/url?id=440767926.mp3',
16            cover: 'http://p2.music.126.net/kmo__VMOex_fRScv2RXStA==/109951162842392590.jpg',
17            lrc: '/lyric/AVICII UMF2016 Live.lrc'
18        },
19        {
20            ...
21        },
22        ]
23    });
24</script>
其中,APlayer.min.js和APlayer.min.css可以使用CDN,也可以在GitHub上下载。配置内容的具体含义参考APlayer官方文档。
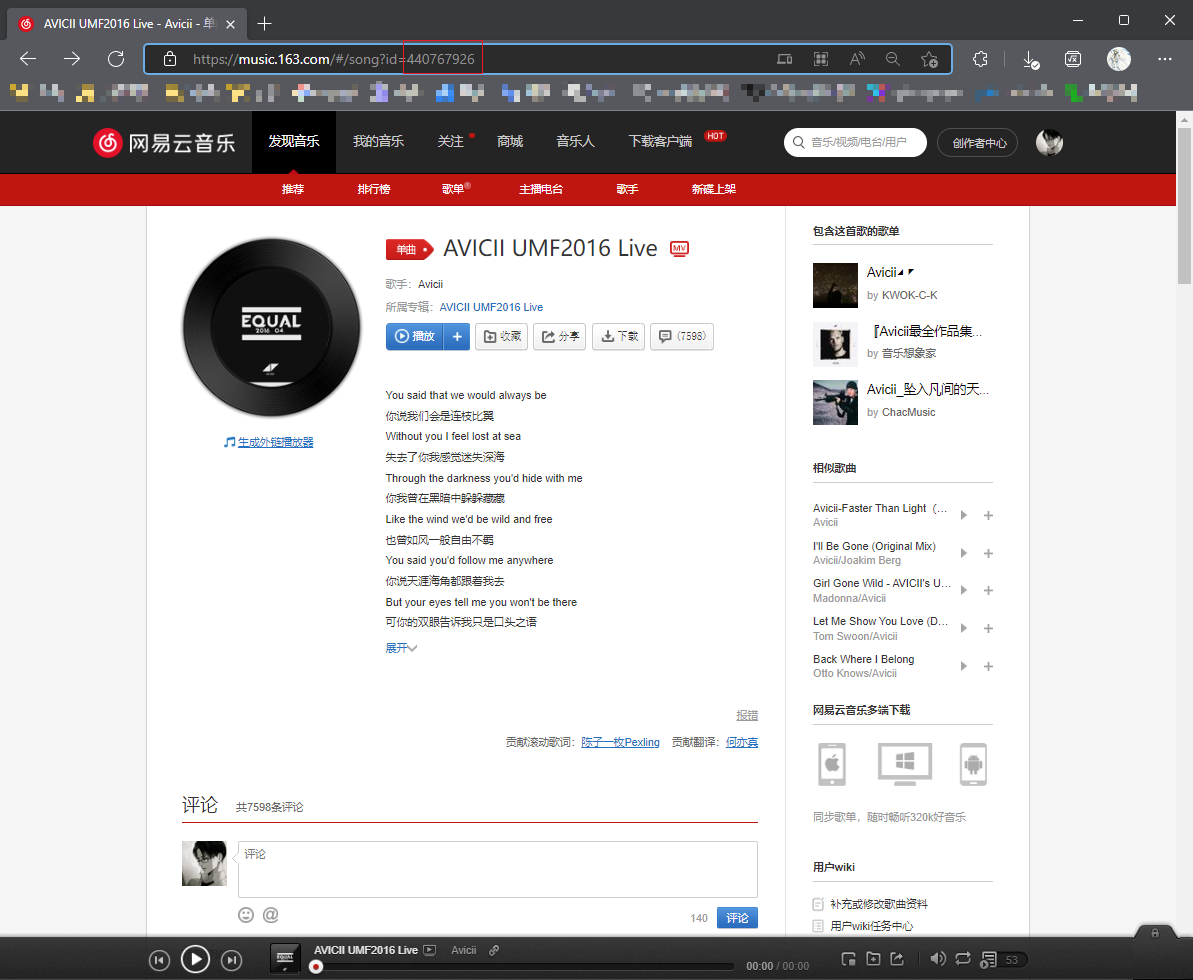
url后面填写歌曲外链。打开网页版网易云音乐,选择非VIP歌曲,点开至歌词页面,将地址栏中的歌曲id,复制到https://music.163.com/song/media/outer/url?id=xxxx.mp3对应位置。
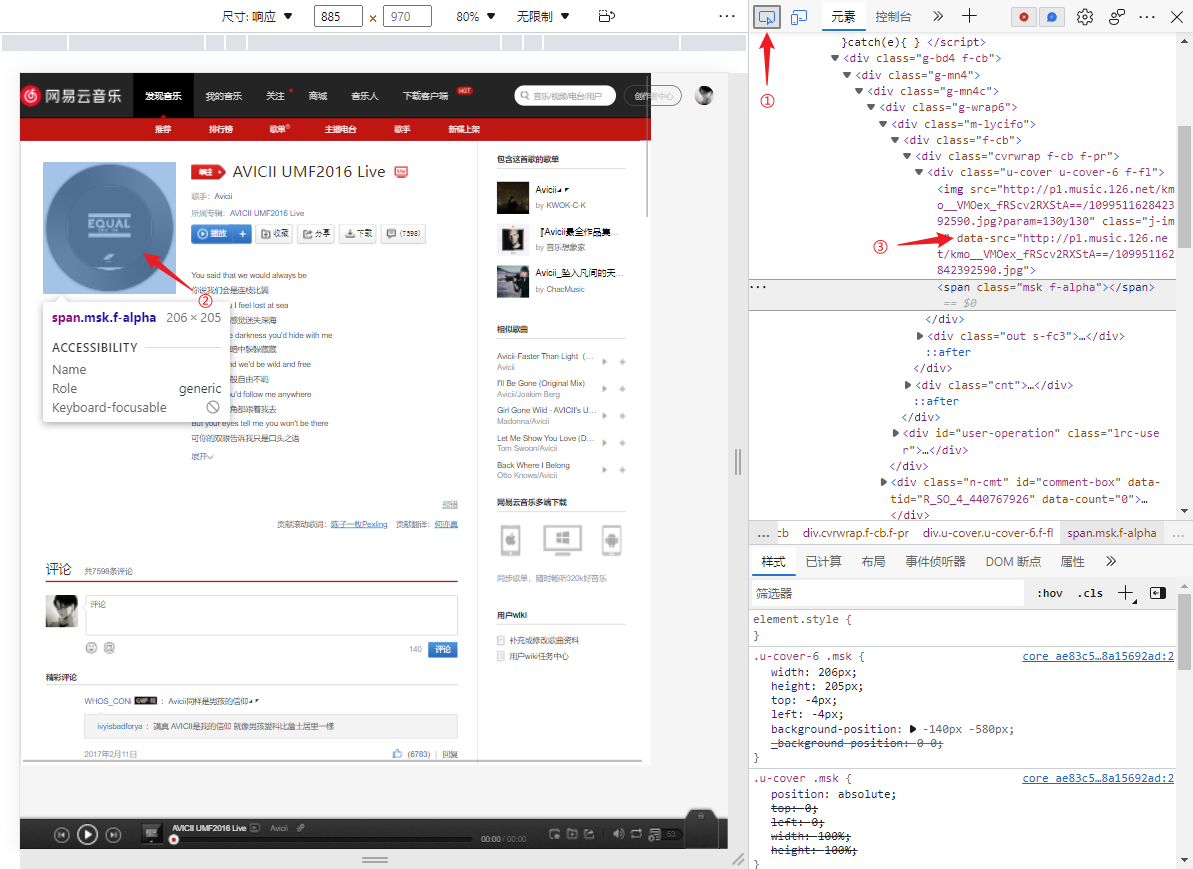
cover后面填写封面图片链接。以edge为例,按F12进入控制台,使用选择元素,选中封面,在对应的img标签内复制data-src属性的值。
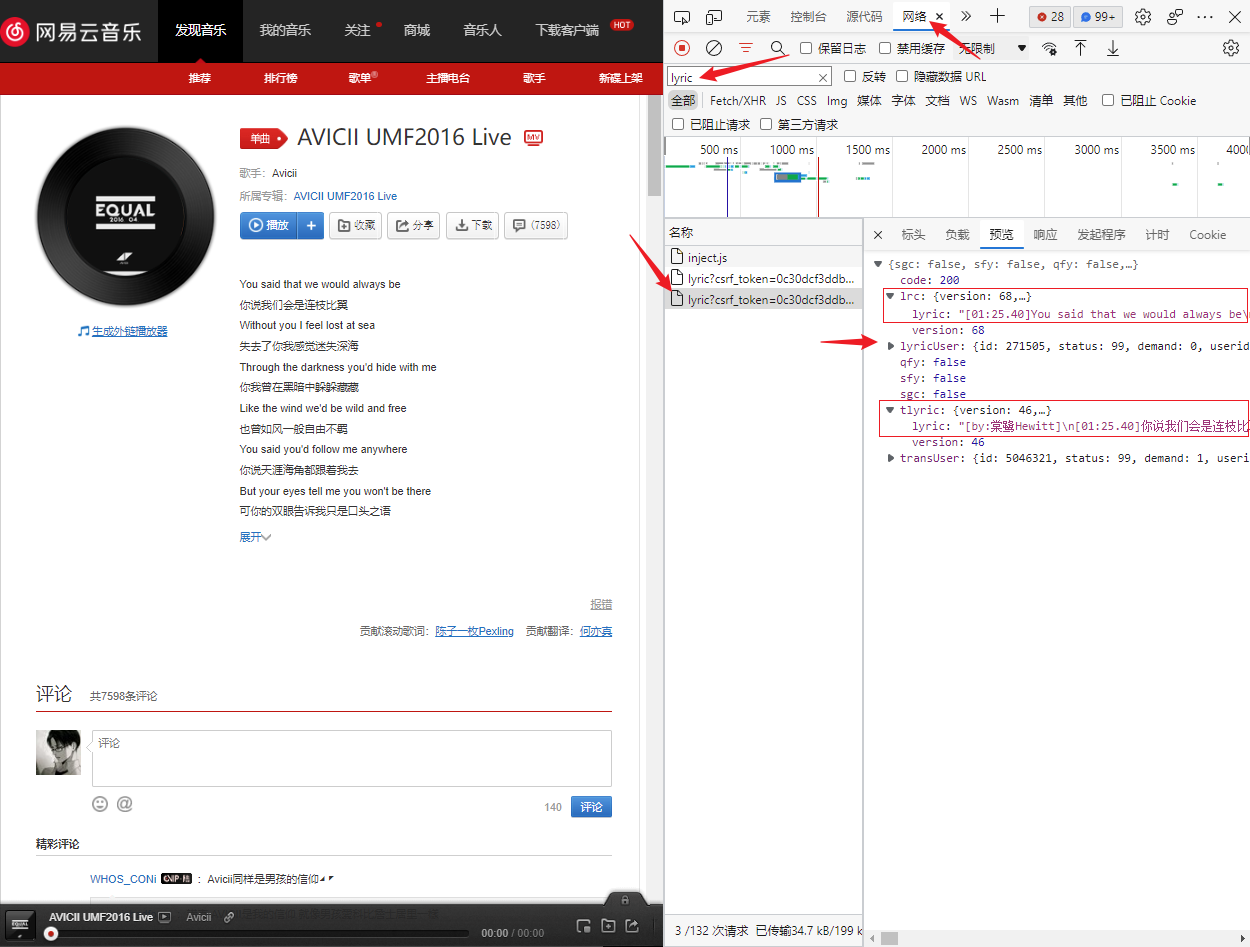
lrc后面填写本地保存的歌词文件。以edge为例,按F12进入控制台,选择网络,搜索lyric,然后刷新歌词页面,找到对应的歌词文件,lrc对应外文歌词,tlyric对应翻译歌词,将lyric后面的值复制到的本地文件中,以.lrc格式保存,然后引用即可。我这里保存在主题目录下source/lyric/中。
注意:链接跳转后播放会被打断,使用pjax可以解决这个问题。
3.12 豆瓣插件
注意:此方法适合像我这样的懒人,由于hexo升级至6.1.0后,不再使用ejs等,建议能折腾的好好重写这个插件。
首先打开命令行,进入博客根目录,执行以下命令,安装hexo-douban豆瓣插件
1npm install hexo-douban --save
在博客根目录_config.yml中添加
 1douban:
 2  user: lordash
 3  builtin: false
 4  book:
 5    title: 'This is my book title'
 6    quote: 'This is my book quote'
 7  movie:
 8    title: 'This is my movie title'
 9    quote: 'This is my movie quote'
10  timeout: 10000
user豆瓣用户名,登录豆瓣,点击个人主页,地址栏URL中https://www.douban.com/people/xxxxxx/后的xxxxxx即是个人ID。title页面标题,builtin是否将生成页面功能嵌入hexo g中,默认为false,quote是页面开头的一段话,timeout是豆瓣接口超时时间,默认为10000毫秒,如果在使用时发现报了超时的错(ETIMEOUT)可以把这个数据设置的大一点。
然后修改_config.next.yml,添加
1menu:
2  books: /books/ || fa fa-book
3  movies: /movies/ || fa fa-film
修改themes\next\languages\zh-CN.yml,添加
1menu:
2  books: 书籍
3  movies: 影音
使用hexo douban生成豆瓣页面,命令行提示
1INFO  0 books have been loaded in 858 ms, because you are offline or your network is bad
2INFO  0 movies have been loaded in 1751 ms, because you are offline or your network is bad
根据打印,在node_modules\hexo-douban\lib\books-generator.js中添加打印
 1...
 2var offline = false;
 3# 添加hexo-log引用
 4var log = require('hexo-log')({
 5    debug: false,
 6    silent: false
 7});
 8
 9var log = require('hexo-log')({
10    debug: false,
11    silent: false
12});
13
14function resolv(url, timeout, headers) {
15
16    var response = '';
17    try {
18        response = request(url, {
19            timeout: timeout,
20            dataType: 'xml',
21            headers: headers,
22        });
23    } catch (err) {
24        # 打印详细错误日志
25        log.error(err);
26        offline = true;
27    }
28    ...
再次hexo douban生成,可以看到详细错误提示,
 1ERROR E:\work\blog\node_modules\urllib-sync\request.js:44
 2  var filepath = path.join(os.tmpDir(), name);
 3                              ^
 4
 5TypeError: os.tmpDir is not a function
 6    at E:\work\blog\node_modules\urllib-sync\request.js:44:31
 7    at done (E:\work\blog\node_modules\urllib\lib\urllib.js:396:5)
 8    at E:\work\blog\node_modules\urllib\lib\urllib.js:628:9
 9    at decodeContent (E:\work\blog\node_modules\urllib\lib\urllib.js:469:14)
10    at IncomingMessage.<anonymous> (E:\work\blog\node_modules\urllib\lib\urllib.js:593:7)
11    at IncomingMessage.emit (node:events:538:35)
12    at endReadableNT (node:internal/streams/readable:1345:12)
13    at processTicksAndRejections (node:internal/process/task_queues:83:21)
14
15Error: E:\work\blog\node_modules\urllib-sync\request.js:44
16  var filepath = path.join(os.tmpDir(), name);
17                              ^
18
19TypeError: os.tmpDir is not a function
20    at E:\work\blog\node_modules\urllib-sync\request.js:44:31
21    at done (E:\work\blog\node_modules\urllib\lib\urllib.js:396:5)
22    at E:\work\blog\node_modules\urllib\lib\urllib.js:628:9
23    at decodeContent (E:\work\blog\node_modules\urllib\lib\urllib.js:469:14)
24    at IncomingMessage.<anonymous> (E:\work\blog\node_modules\urllib\lib\urllib.js:593:7)
25    at IncomingMessage.emit (node:events:538:35)
26    at endReadableNT (node:internal/streams/readable:1345:12)
27    at processTicksAndRejections (node:internal/process/task_queues:83:21)
28
29    at request (E:\work\blog\node_modules\urllib-sync\index.js:44:13)
30    at resolv (E:\work\blog\node_modules\hexo-douban\lib\books-generator.js:25:20)
31    at Hexo.module.exports (E:\work\blog\node_modules\hexo-douban\lib\books-generator.js:134:23)
32    at Hexo.tryCatcher (E:\work\blog\node_modules\bluebird\js\release\util.js:16:23)
33    at Hexo.<anonymous> (E:\work\blog\node_modules\bluebird\js\release\method.js:15:34)
34    at E:\work\blog\node_modules\hexo\lib\hexo\index.js:407:22
35    at tryCatcher (E:\work\blog\node_modules\bluebird\js\release\util.js:16:23)
36    at MappingPromiseArray._promiseFulfilled (E:\work\blog\node_modules\bluebird\js\release\map.js:68:38)
37    at MappingPromiseArray.PromiseArray._iterate (E:\work\blog\node_modules\bluebird\js\release\promise_array.js:115:31)
38    at MappingPromiseArray.init (E:\work\blog\node_modules\bluebird\js\release\promise_array.js:79:10)
39    at MappingPromiseArray._asyncInit (E:\work\blog\node_modules\bluebird\js\release\map.js:37:10)
40    at _drainQueueStep (E:\work\blog\node_modules\bluebird\js\release\async.js:97:12)
41    at _drainQueue (E:\work\blog\node_modules\bluebird\js\release\async.js:86:9)
42    at Async._drainQueues (E:\work\blog\node_modules\bluebird\js\release\async.js:102:5)
43    at Immediate.Async.drainQueues [as _onImmediate] (E:\work\blog\node_modules\bluebird\js\release\async.js:15:14)
44    at processImmediate (node:internal/timers:466:21)
看来是由于Node.js升级后,os.tmpDir()方法失效导致。我们使用os.tmpdir()替换node_modules\urllib-sync\request.js中的os.tmpDir(),再次使用hexo douban后,生成成功。
使用
pjax,还需要修改node_modules\hexo-douban\lib\templates\book.ejs,
1/* 添加data-pjax属性 */
2<script data-pjax>
3    <% include index.js %>
4    <% include pagination.js %>
5</script>